
hello Friday!
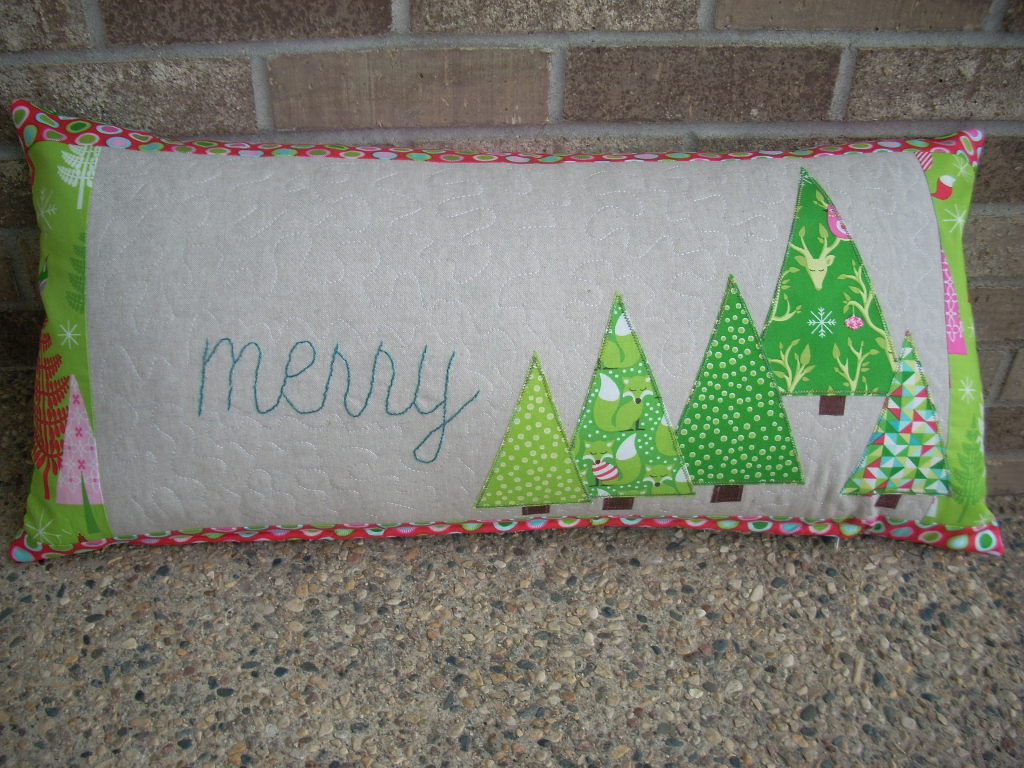
today I am sharing another fun project using Tamara Kate’s Festive Forest
love, love this line!!
to see my other project, click here…
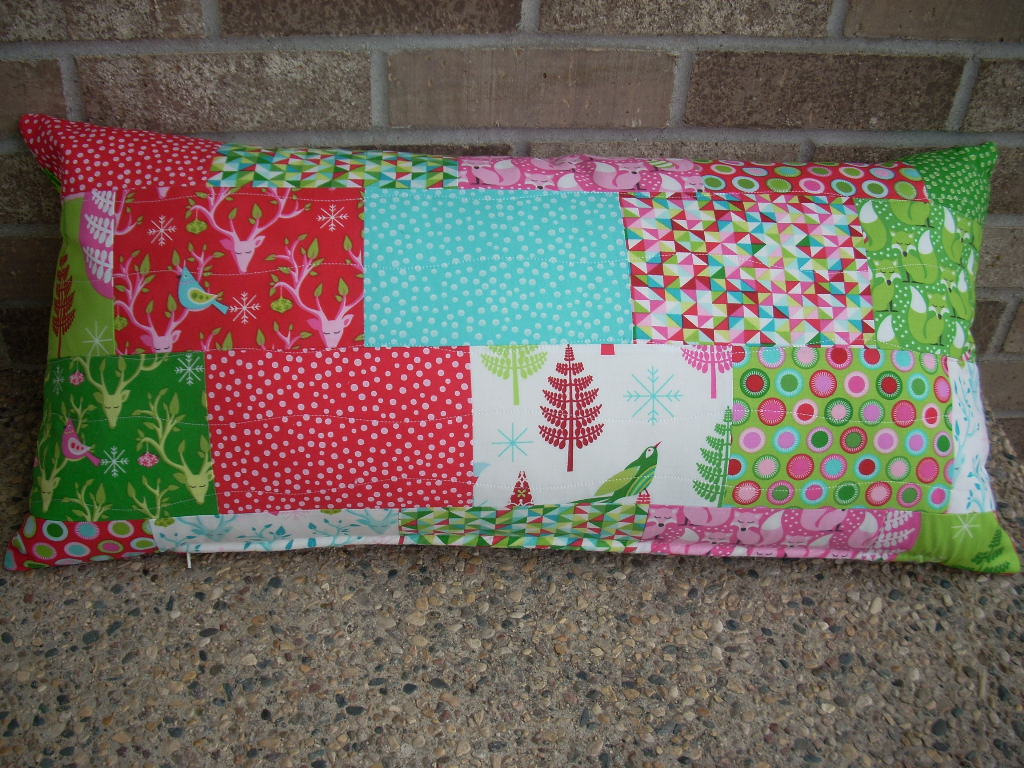
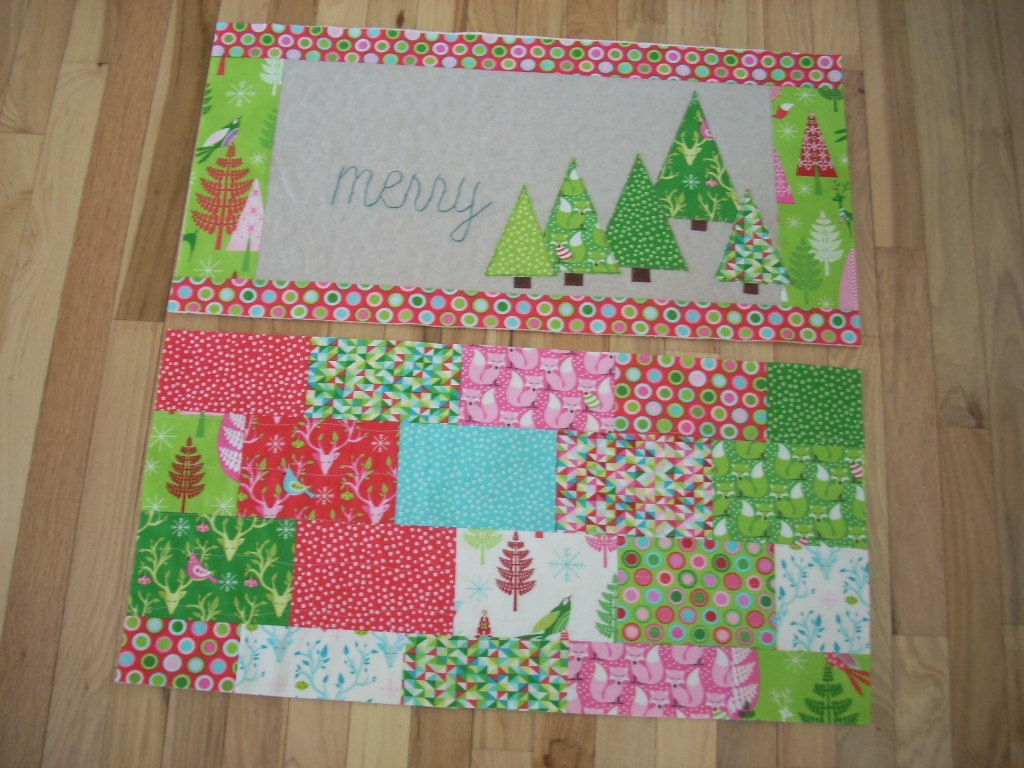
this pillow cover is actually two-sided…lots of fun rectangle prints make up the second side…
it fits a 14 x 28 pillow form…

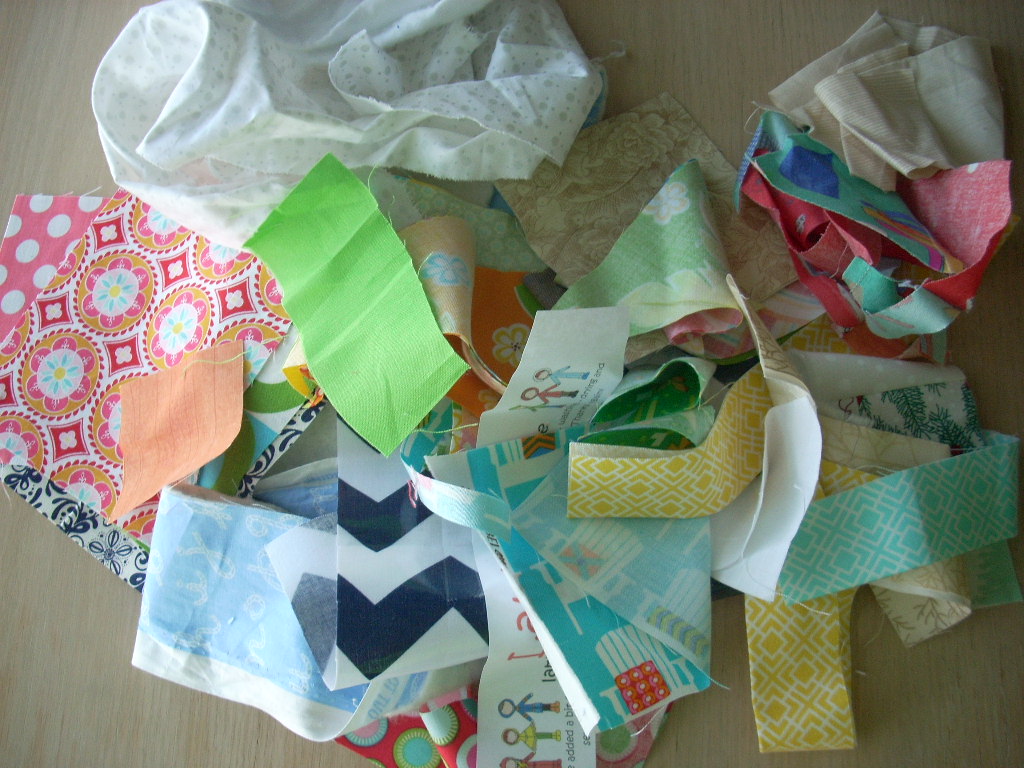
you will need an assortment of prints from this line…this project is perfect for fat quarters
some brown fabric for tree trunks…I used basicgrey’s grunge
1/2 yard of Essex linen
batting
embroidery floss
and a zipper
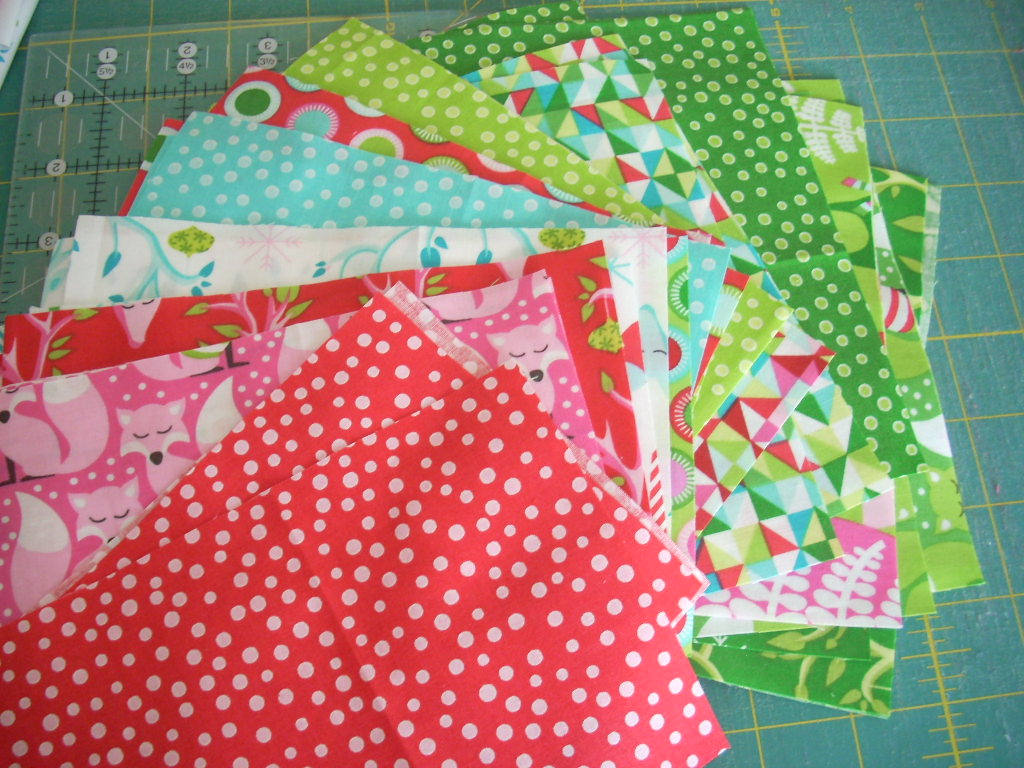
cut a variety of 4.5 x 6.5 inch rectangles – you will need at least 22 rectangles
cut two 3 inch strips for the top and bottom border on the front
cut two 3.5 inch pieces for the side borders

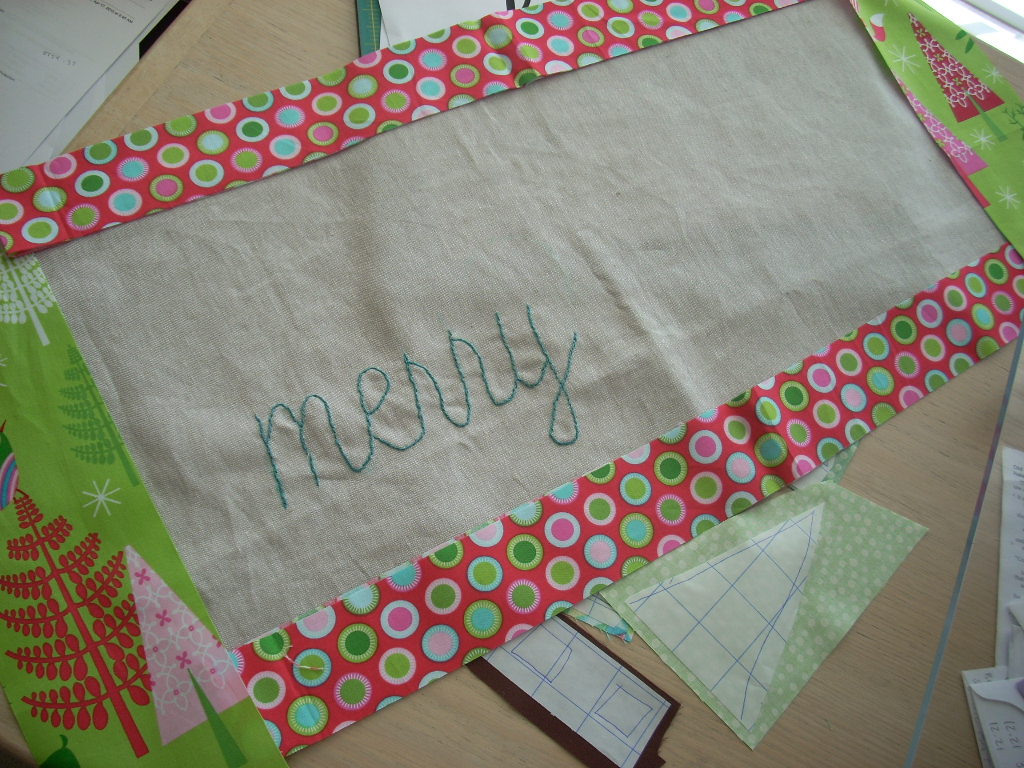
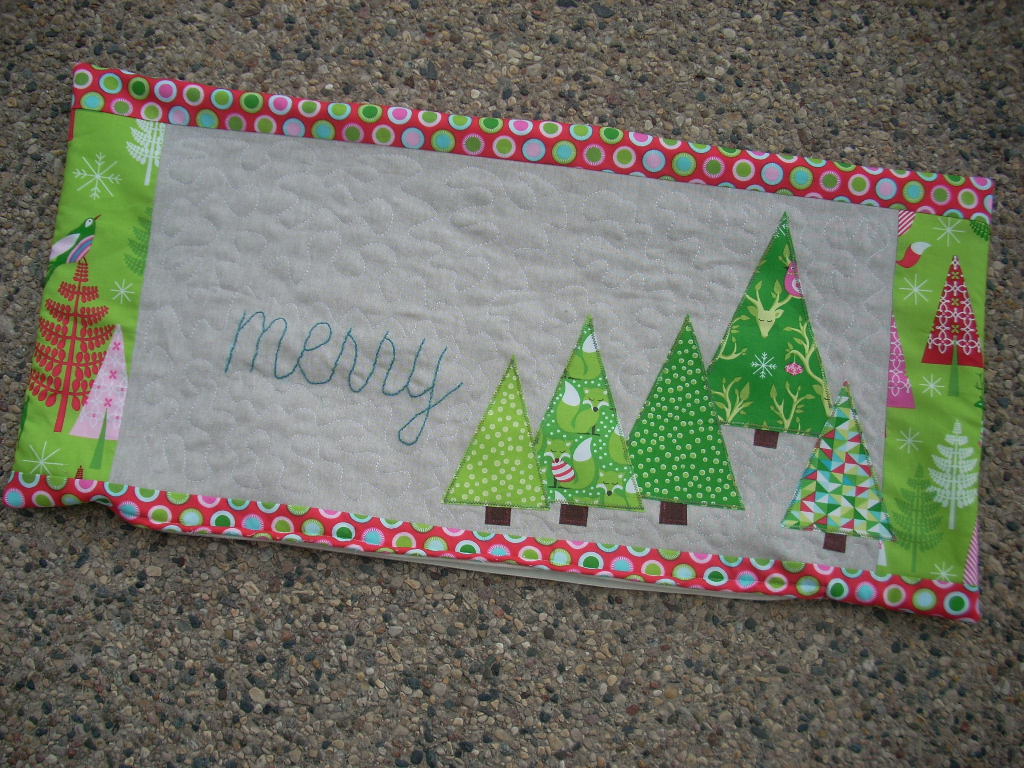
on a piece of linen, I traced the word “merry” to embroider
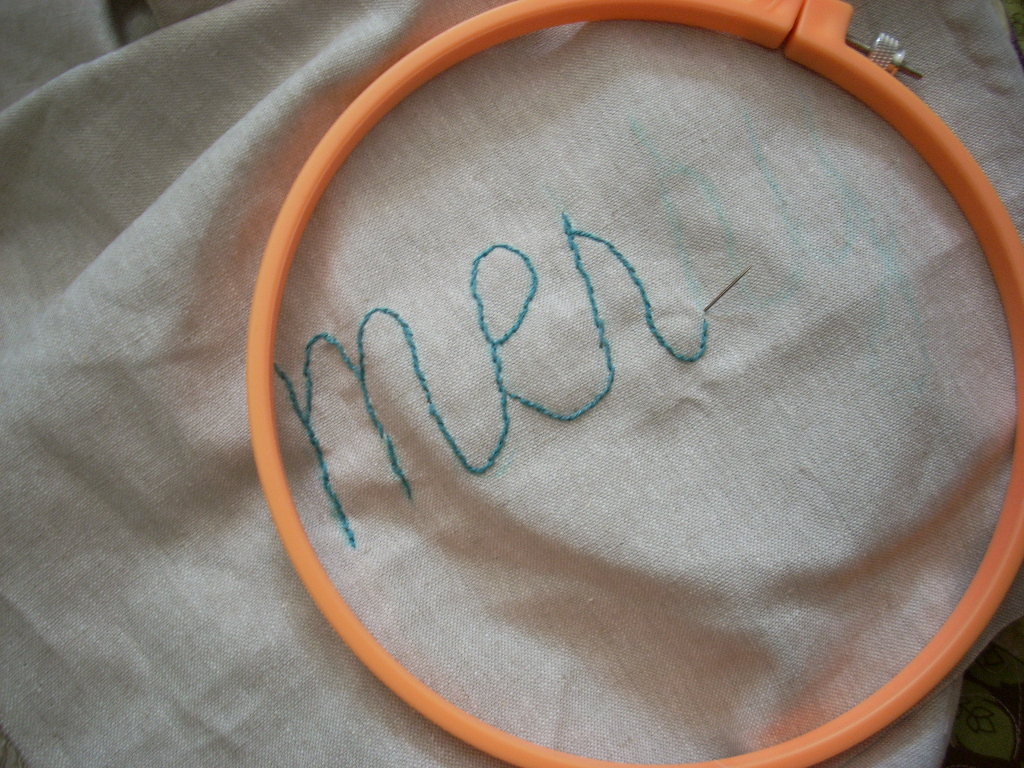
*tip* think about if you want the embroidery on an angle or straight and whereabouts you want it on your finished pillow. I wish I had put mine on more of an angle

once I finished my embroidery, I auditioned some of the green prints I wanted to use for trees along with some border ideas
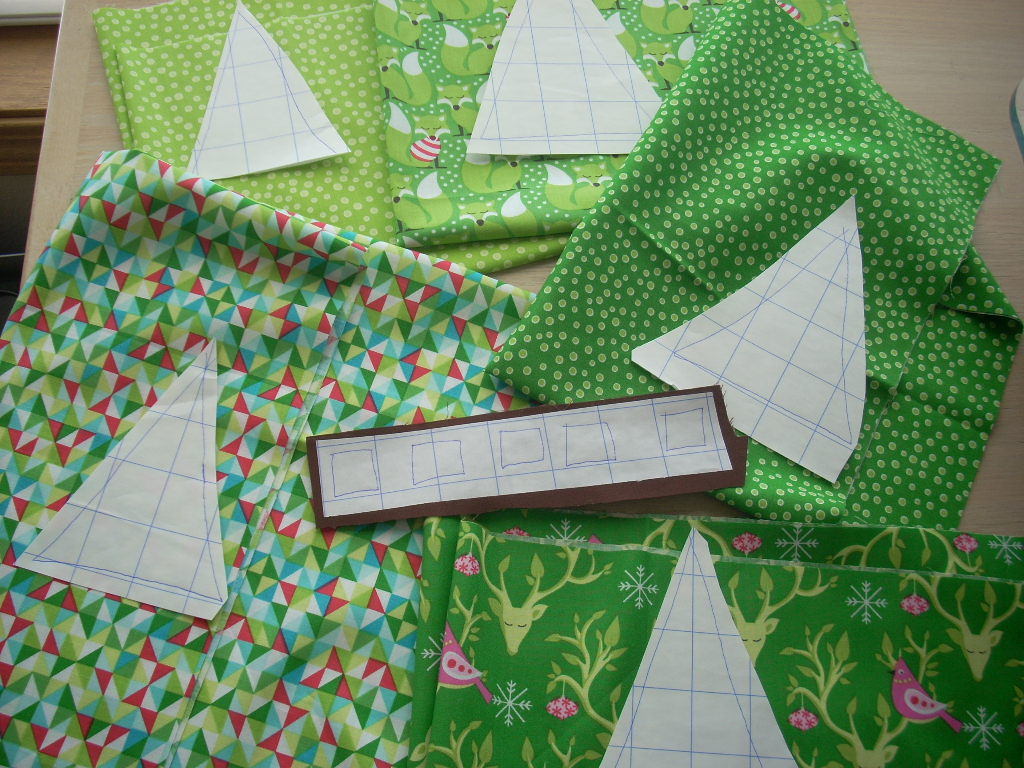
on a sheet of fusible web, I free hand drew some simple triangle shapes for trees in a few different sizes along with some simple squares for trunks
trim linen to 11 x 22 inches
sew side border pieces to linen and then sew on the top and bottom border pieces

once I decided upon an arrangement of trees, I ironed them in place and did a small zig zag around the trees and trunks
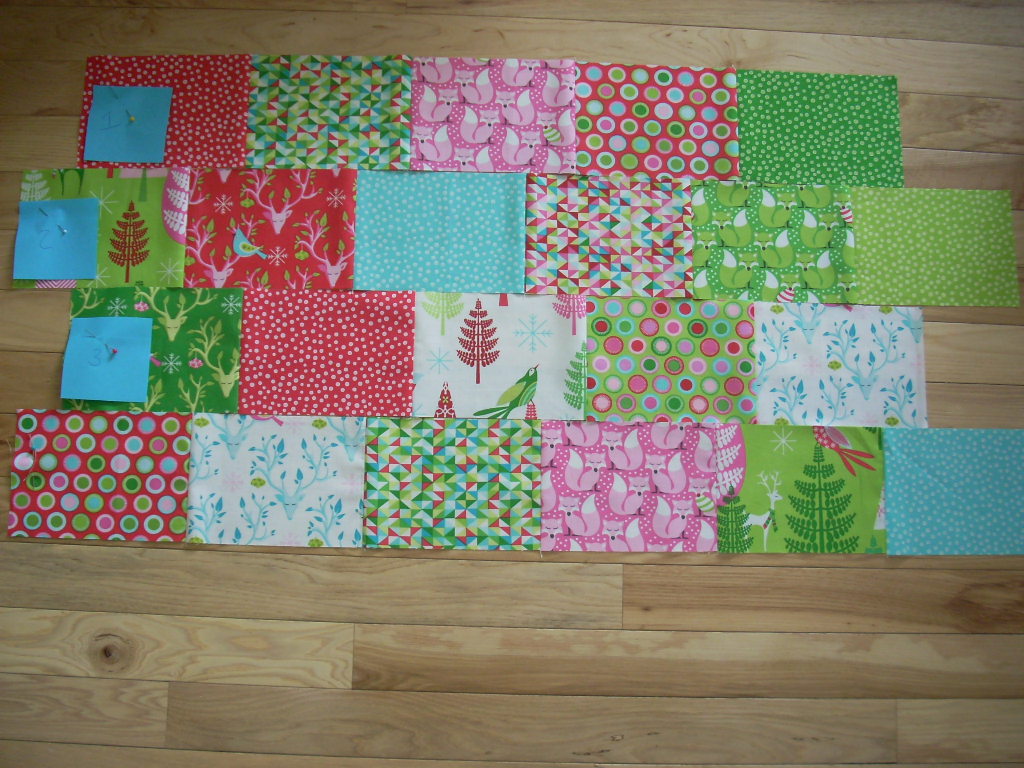
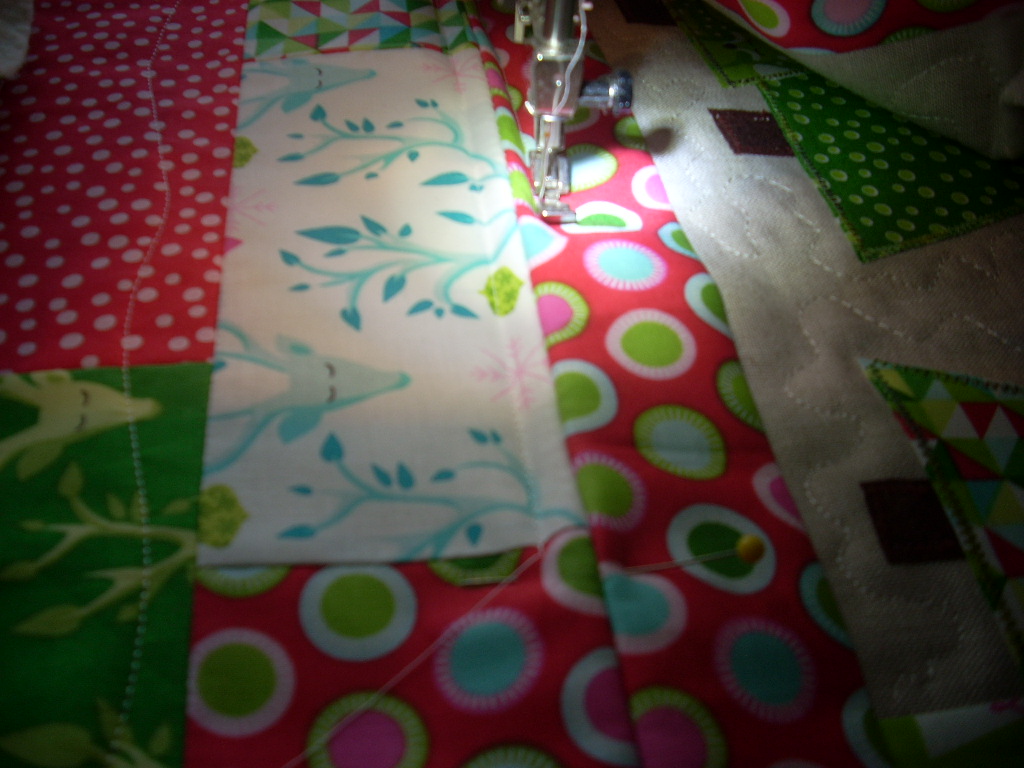
arrange a variety of rectangles in four rows by either 5 or 6 across
I wanted mine staggered
sew into rows and then the rows into one unit
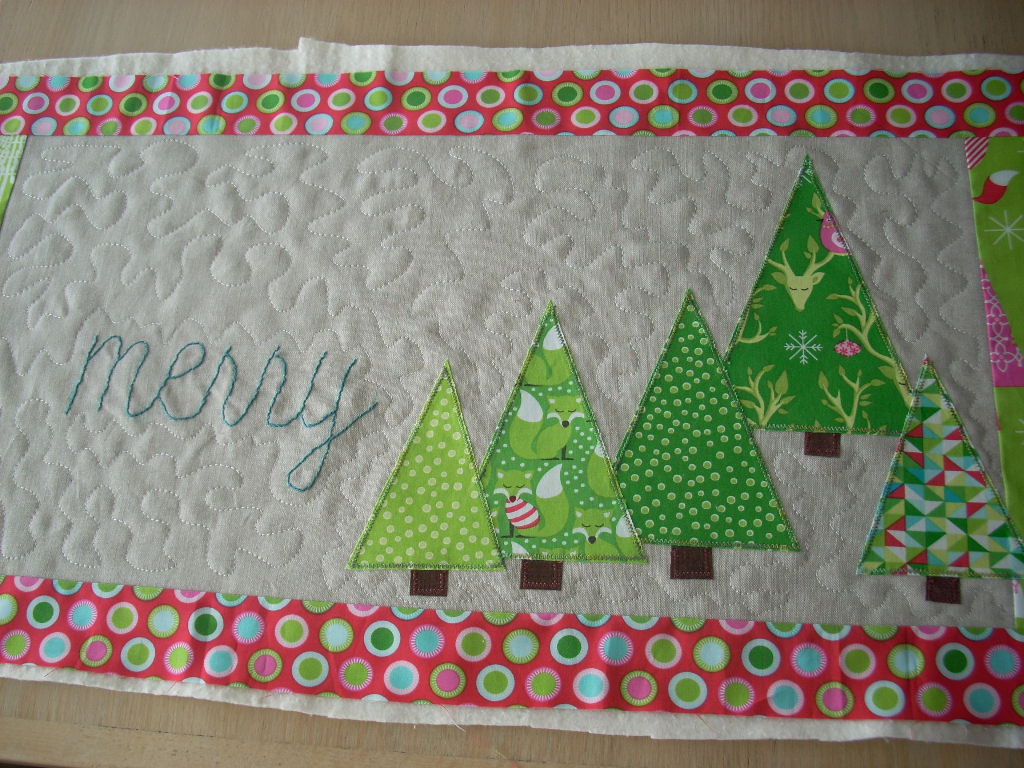
lay each side on a piece of batting and do some simple quilting
for the front, I did a simple meandering and on the back, I did simple curvy lines
trim each piece to 14.5 x 28

with right sides together, baste the bottom together using 1/2 inch seam allowance
before sewing, I laid my zipper on the seam to know which part to seam at regular stitch length and which to use long basting stitches
press seam open
lay zipper right side facing the seam allowance and pin in place
using your zipper foot, start at the bottom and stitch up each side and around the top and bottom, stopping every so often to check that the zipper is positioned properly

using a seam ripper, gently pop those basting stitches to reveal the zipper
do this for the length of the zipper
remember to unzip the zipper a bit before sewing together the sides and top seam so that you can turn the pillow cover right side out!
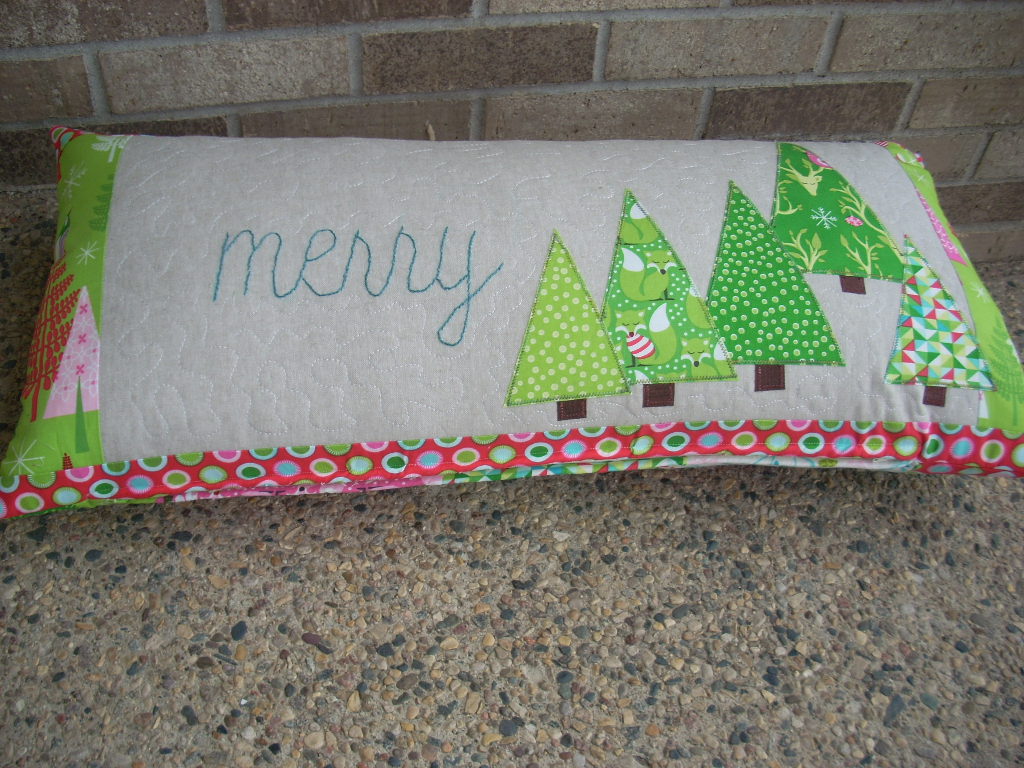
you are now ready to insert your pillow form and enjoy your pillow cover!
this cover is also listed in my etsy shop…
if you would like a copy of the pattern sheet…leave me a comment or email me – brooke@sillymamaquilts.com
since this is a finished project, I am linking up with Crazy Mom Quilts
I also wanted to announce the winner of this week’s giveaway…
congratulations to Sarah J!!
I am emailing you!
Happy Sewing!
Adorable! You are so talented!! And have such a great imagination!!
I LOVE this! I have the same sized pillow form and I really appreciate the instructions on how you constructed this! I was wondering about doing a zipper instead of the envelope back and thanks to you, I’m going to brave the zipper!
This pillow looks so “festive”. I would love to have the pattern for it.
A big “thumbs up”!!!!!
I would love to receive the pattern sheet. Thank you!
I like the fact this is a two sided pillow. Very cheerful.
I love your pillow design but had a ‘light bulb moment’ when I saw how you laid out the zipper in the seam. You are brilliant!
such a cheery pillow! thanks for sharing with us